Set up the CAD for your community
Install the CAD, set up the departments that sign on to it, give your staff access, and work through the CAD settings in the order that gets you running fastest.
The CAD is your community's dispatch, police, fire and EMS terminal, plus civilian records, all running live on your community website. Members open it from the Open CAD button on your site. Everything about how it behaves, from the call types dispatchers pick to the charges officers file, is set up from your control panel.
A new CAD works straight away with a starter set of statuses and call types, so you can test it the same day. This article takes you from installing the module to your first officer signing on, then points you at the settings worth changing next.
Before you start#
- To install the CAD you need to be the owner, or have the Install and remove modules permission.
- To change any CAD settings you need the Set up the CAD: call types, statuses, penal code, designs and AOP permission. Owners and administrators have it already.
Step 1: Install the CAD#
- Open your control panel and click Install modules at the bottom of the left sidebar.
- Find CAD and click Install.
The CAD now appears under Modules in the sidebar, with CAD settings, Warrants, Reports and other pages beneath it. For more on modules, see Add or remove modules for your community.
Step 2: Set up the departments that use it#
The CAD doesn't have its own list of officers. People sign on through the departments they're in, so the department's Type decides which panel they get:
| Department type | What its members can do in the CAD |
|---|---|
| Law enforcement | Sign on as police units. |
| Fire | Sign on as fire units. |
| EMS | Sign on as EMS units. |
| Dispatch | Sign on as dispatchers. |
| Any other type | Use the Civilian panel only. |
Every member of your community can use the Civilian panel, whether or not they're in a department.
- Click Departments & ranks in the sidebar.
- Create a department for each service you run, and pick the right Type for it.
- Add people to each department's roster with a callsign. The CAD fills in their callsign from the roster when they sign on.
Only members with the status Active or In training can sign on. See Create a department and Add someone to the roster and set their callsign.
Step 3: Give your staff the right permissions#
Signing on as a unit only needs a place on a roster. Supervisors and admins need permissions on top of that. Open Roles & permissions and add these to the right roles:
| Permission | Who usually needs it |
|---|---|
| Set up the CAD: call types, statuses, penal code, designs and AOP | Whoever looks after the CAD settings. |
| Use the dispatch console | People who dispatch but aren't in a dispatch department. |
| Supervise on duty: sign units off, set a Signal 100 and read private messages | Shift supervisors. |
| Review reports: approve them or send them back | Supervisors who check paperwork. |
| Approve or deny warrants officers request | Supervisors or judges, if warrants need approval. |
The other CAD permissions (DMV desk, tow queue, judges, banking, evidence and so on) are explained in Every permission explained.
Step 4: Work through the CAD settings#
Click CAD settings in the sidebar. The pages are grouped along the top: General, Dispatch, Map & places, Records & courts and Services. Click a group to see its pages underneath.
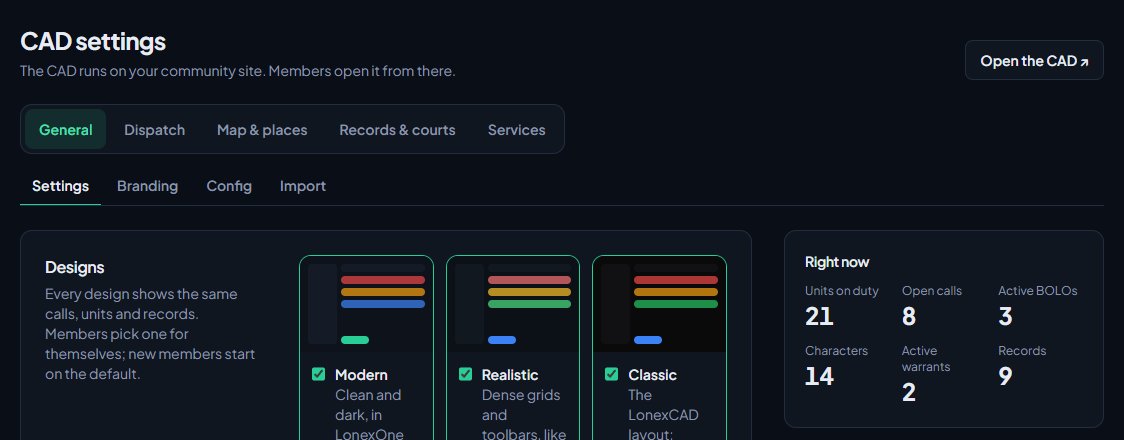
You don't need to visit every page. This is a sensible order:
- Settings (under General): set your Area of patrol, pick which designs members can use, and switch off any parts of the CAD you don't want. Click Save settings. See Choose which CAD designs members can use and Turn CAD features on and off.
- Unit statuses and Call types (under Dispatch): the starter sets load the first time you open either page. Rename, add or delete to match your community. See Set up unit statuses and 10-codes and Add your own call types.
- Penal code (under Records & courts): starts empty. Click Load starter penal code, or add your own charges. See Build your penal code.
- Report templates (under Records & courts): starts empty too. Click Load starter templates or build your own. See Build report templates for your units.
- Live map and Postals & streets (under Map & places): pick the map and postals your game server uses. See Choose a map and postal set for the live map.
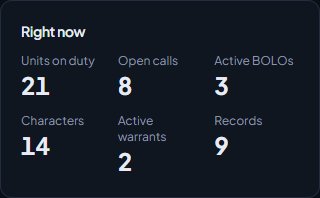
The Right now box on the Settings page shows how many units are on duty, open calls, active BOLOs, characters, active warrants and records. It's a quick way to check the CAD is being used.
Step 5: Try it#
- On the Settings page, click Open the CAD at the top right. It opens your community site's CAD in a new tab.
- Make sure you're on the roster of a law enforcement or dispatch department, then sign on. See Go on duty in the CAD.
- Create a test call and check the call types, priorities and statuses look the way you want.
If you've already got a lot of setup in another LonexOne community, you can copy it across instead of starting again. See Copy your CAD setup to another community.
Something not working?#
I can't see CAD settings in the sidebar. Either the CAD isn't installed, or your role doesn't have the Set up the CAD: call types, statuses, penal code, designs and AOP permission. Install it from Install modules, or ask your owner to add the permission.
A member only sees the Civilian panel. They see Join a police, fire, EMS or dispatch department to go on duty in the CAD. Check they're on the roster of a department with the type Law enforcement, Fire, EMS or Dispatch, and that their status there is Active or In training.
A member sees "Join this community to use its CAD". They're signed in to LonexOne but haven't joined your community yet. Ask them to click Sign in on your community website, which adds them as a member.
Members can't find the CAD on the website. Check the CAD is still installed under Install modules. Removing it takes away the Open CAD button.
See also
Add or remove modules for your community
Install the CAD, Training, the Staff Panel and the rest from your control panel, and what happens to your data when you remove one.
Choose which CAD designs members can use
The CAD comes in three designs, Modern, Realistic and Classic. Choose which ones your members can switch between, which one new members start on, and how members change design.
Add your own call types
Set up the call types dispatchers and units pick from, with an optional code and a starting priority. Rename the starter set, add your own, change the order and delete what you don't use.
Set up unit statuses and 10-codes
Choose the statuses police, fire and EMS units set themselves to, with your own 10-codes, colours and status-check timers, and learn what each status meaning does.
Build your penal code
Set up the charges officers pick on citations, arrests and warrants, with fines, jail time and licence points. Load the starter penal code, add your own charges or import them from a spreadsheet.
Turn CAD features on and off
Switch off the parts of the CAD your community doesn't use, from the DMV and courts to ride-alongs and Signal 100, and set the options that go with them, like quiet call closing, warrant approval and alert tones.
Go on duty in the CAD
Sign on with your department and callsign, skip the panel screen with a default, go off duty, and fix the messages that stop you signing on.
Choose a map and postal set for the live map
Switch on the live map, pick a ready-made map that matches your server's postal script, load the matching postals, and decide how postals and street names work on calls.
Can't find what you need?
Open a ticket in our Discord and someone from the team will help. Found a bug, or missing a feature? Tell us on the feedback board.